
You can now manage your billing process directly within Neutrinet. Follow the steps below to create, send, and track your invoices.
1. Accessing the Bills Section
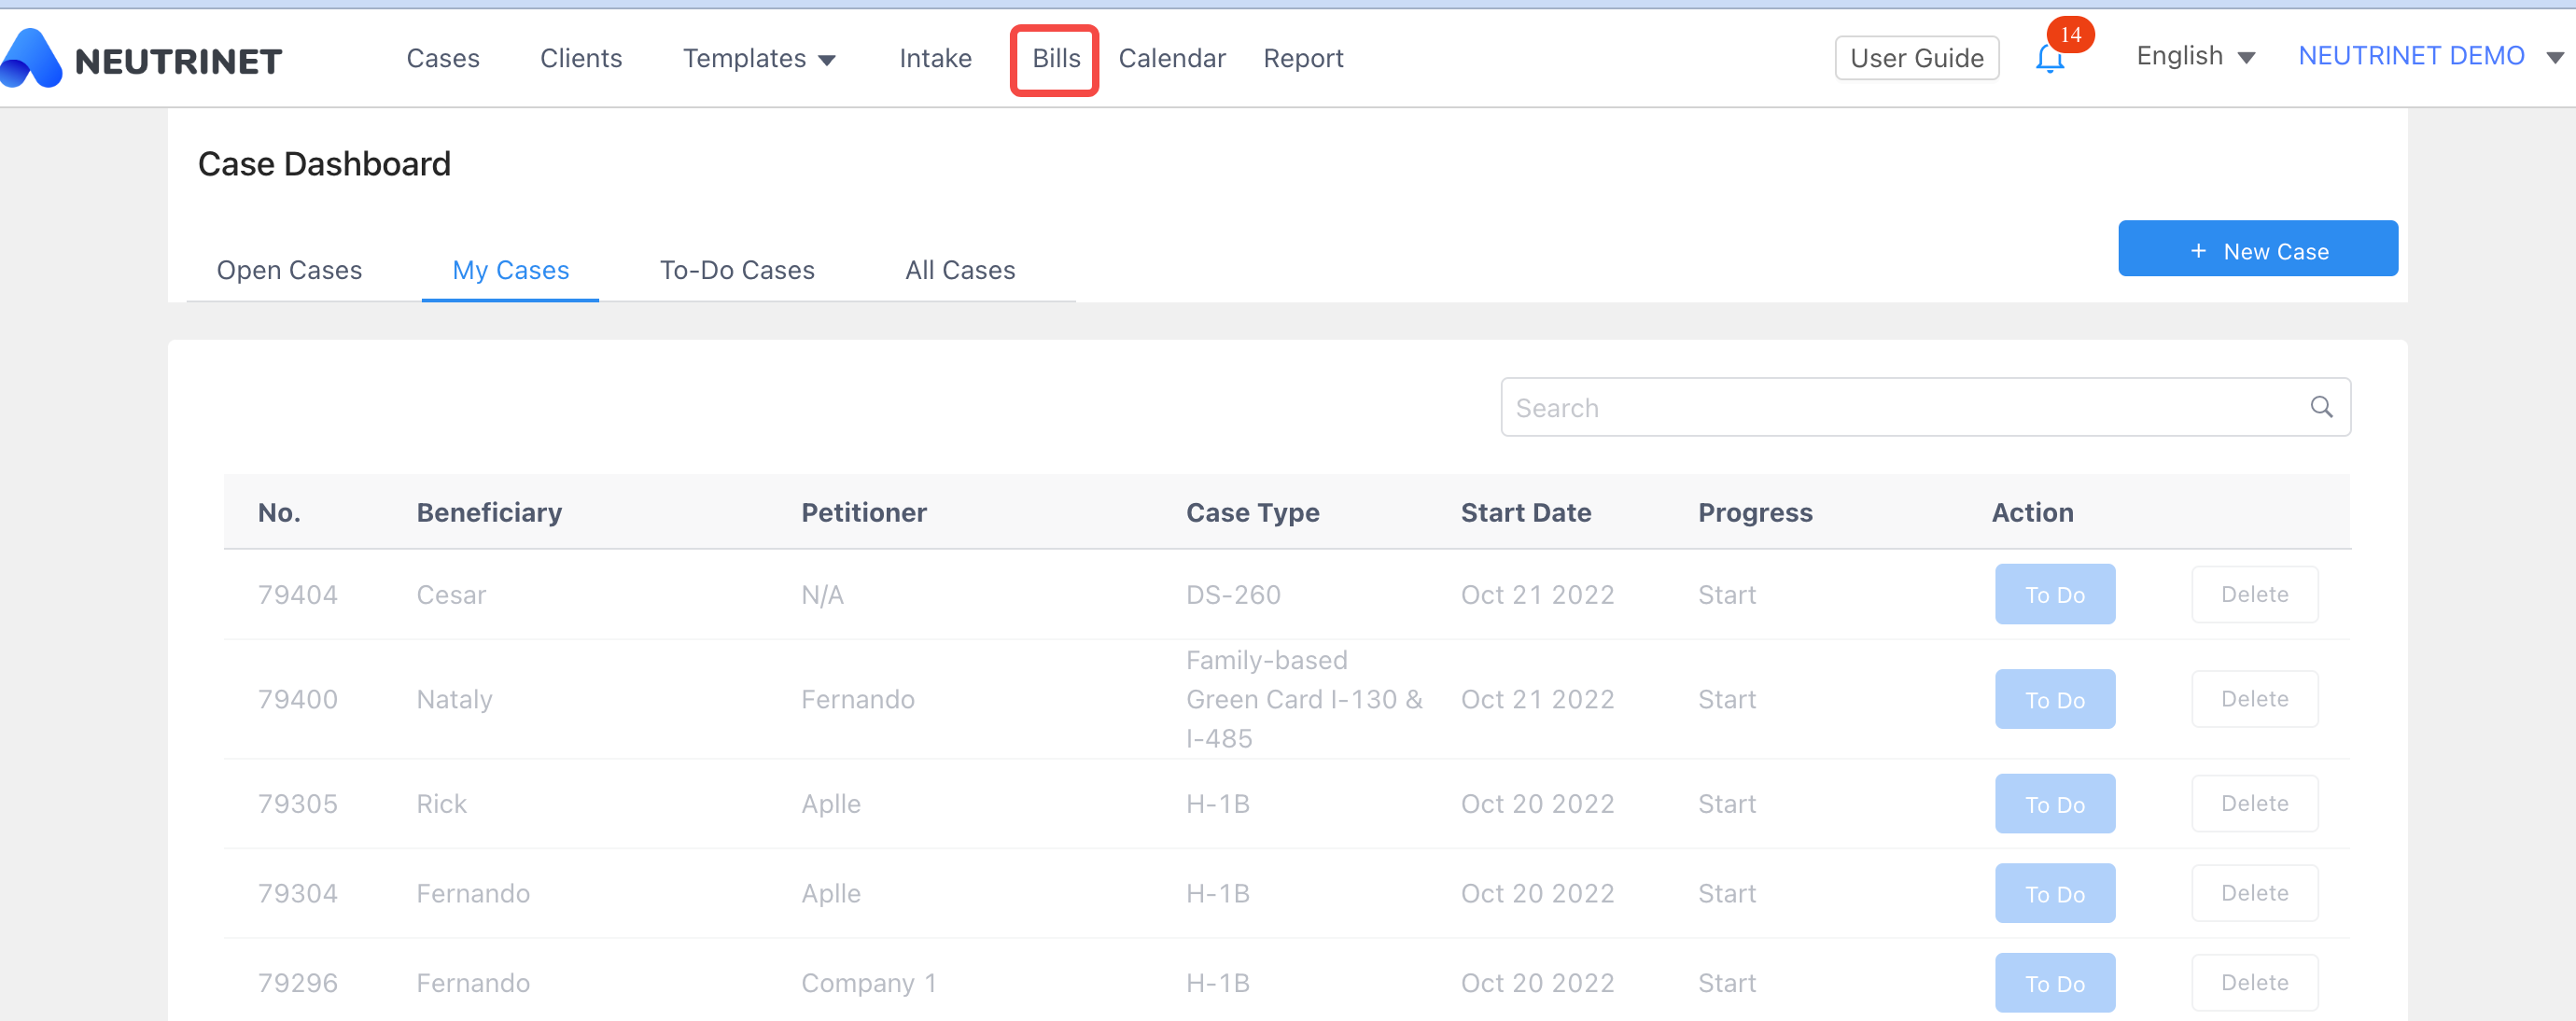
In the top navigation bar of your dashboard, click on the Bills tab. This will take you to your main billing management area.
2. Creating a New Bill
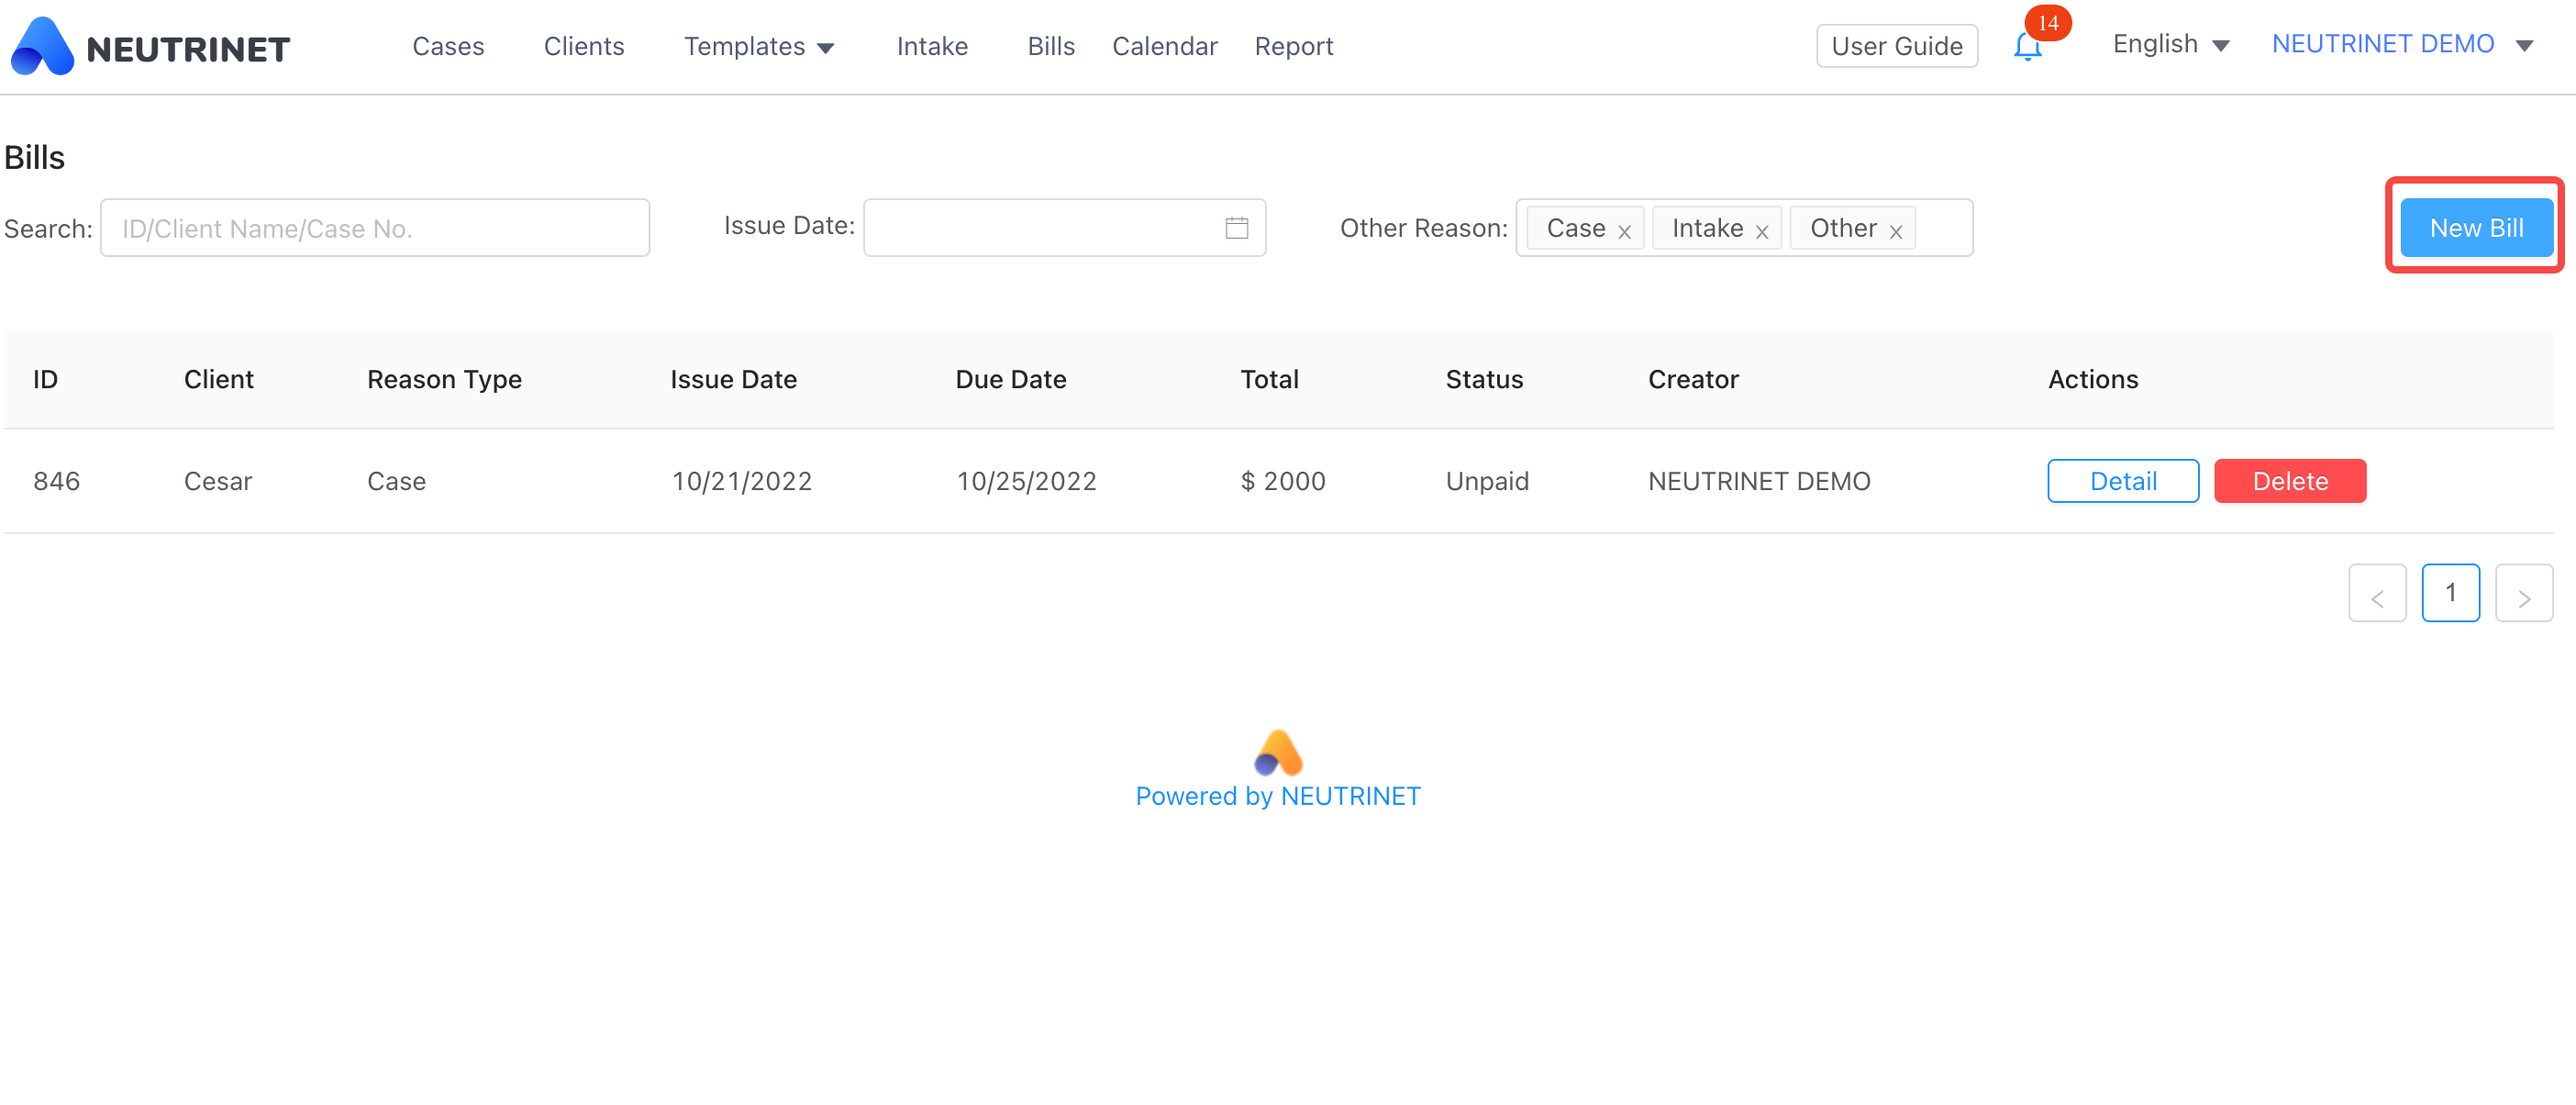
Within the billing section, you can start a new invoice by clicking the New Bill button.
2. Creating a New Bill
Within the billing section, you can start a new invoice by clicking the New Bill button.
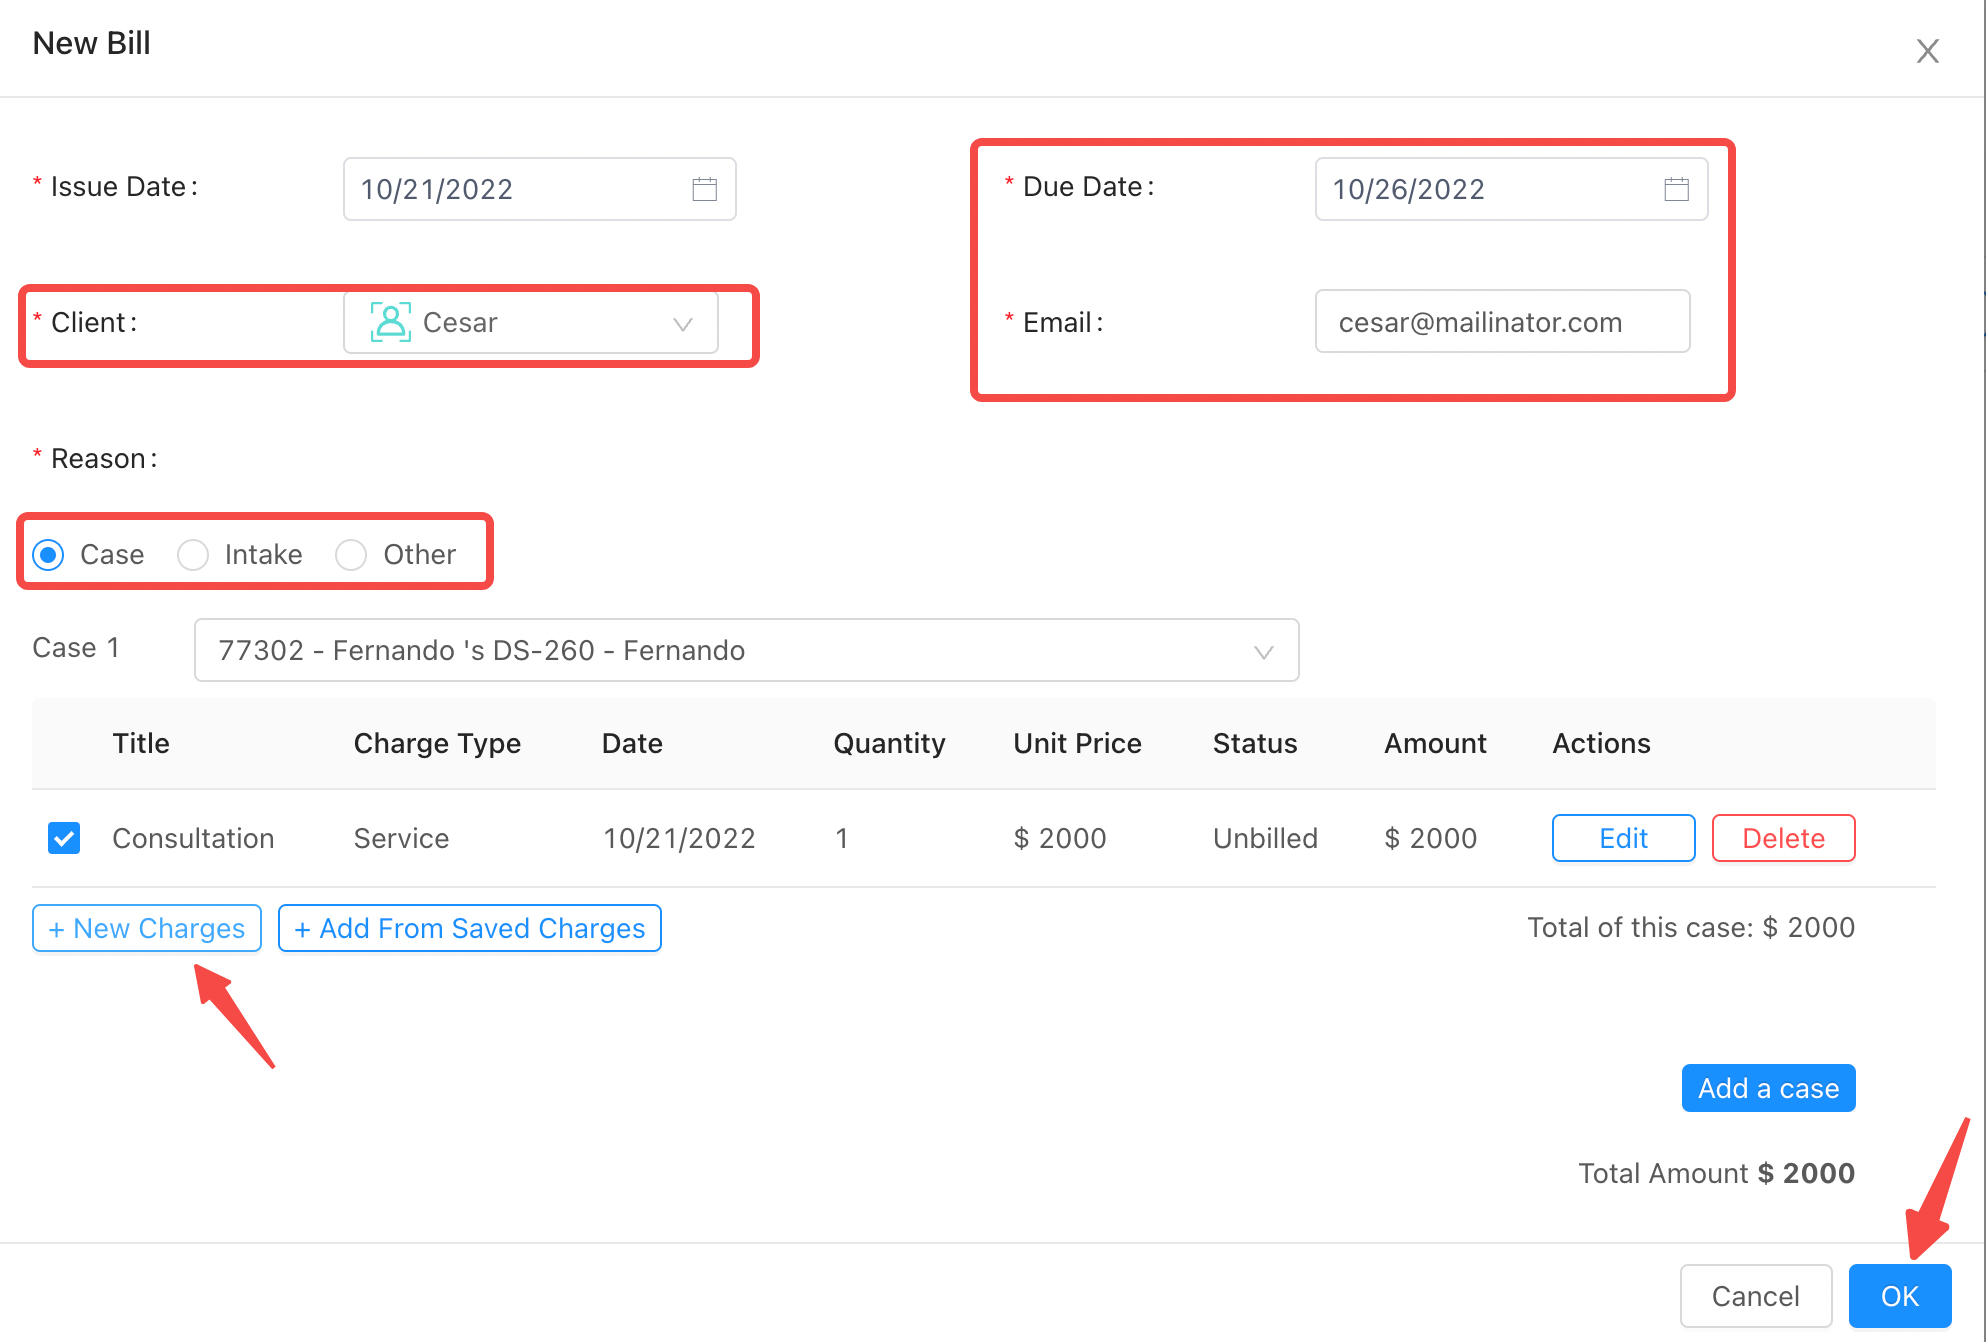
Fill in the following details:
Client Information: Select the client and their email address.
Due Date: Set the deadline for the payment.
Category: Select whether the bill is related to a Case, Intake, or Other.
Charge: Enter the total amount and click OK.
3. Managing and Sending Invoices
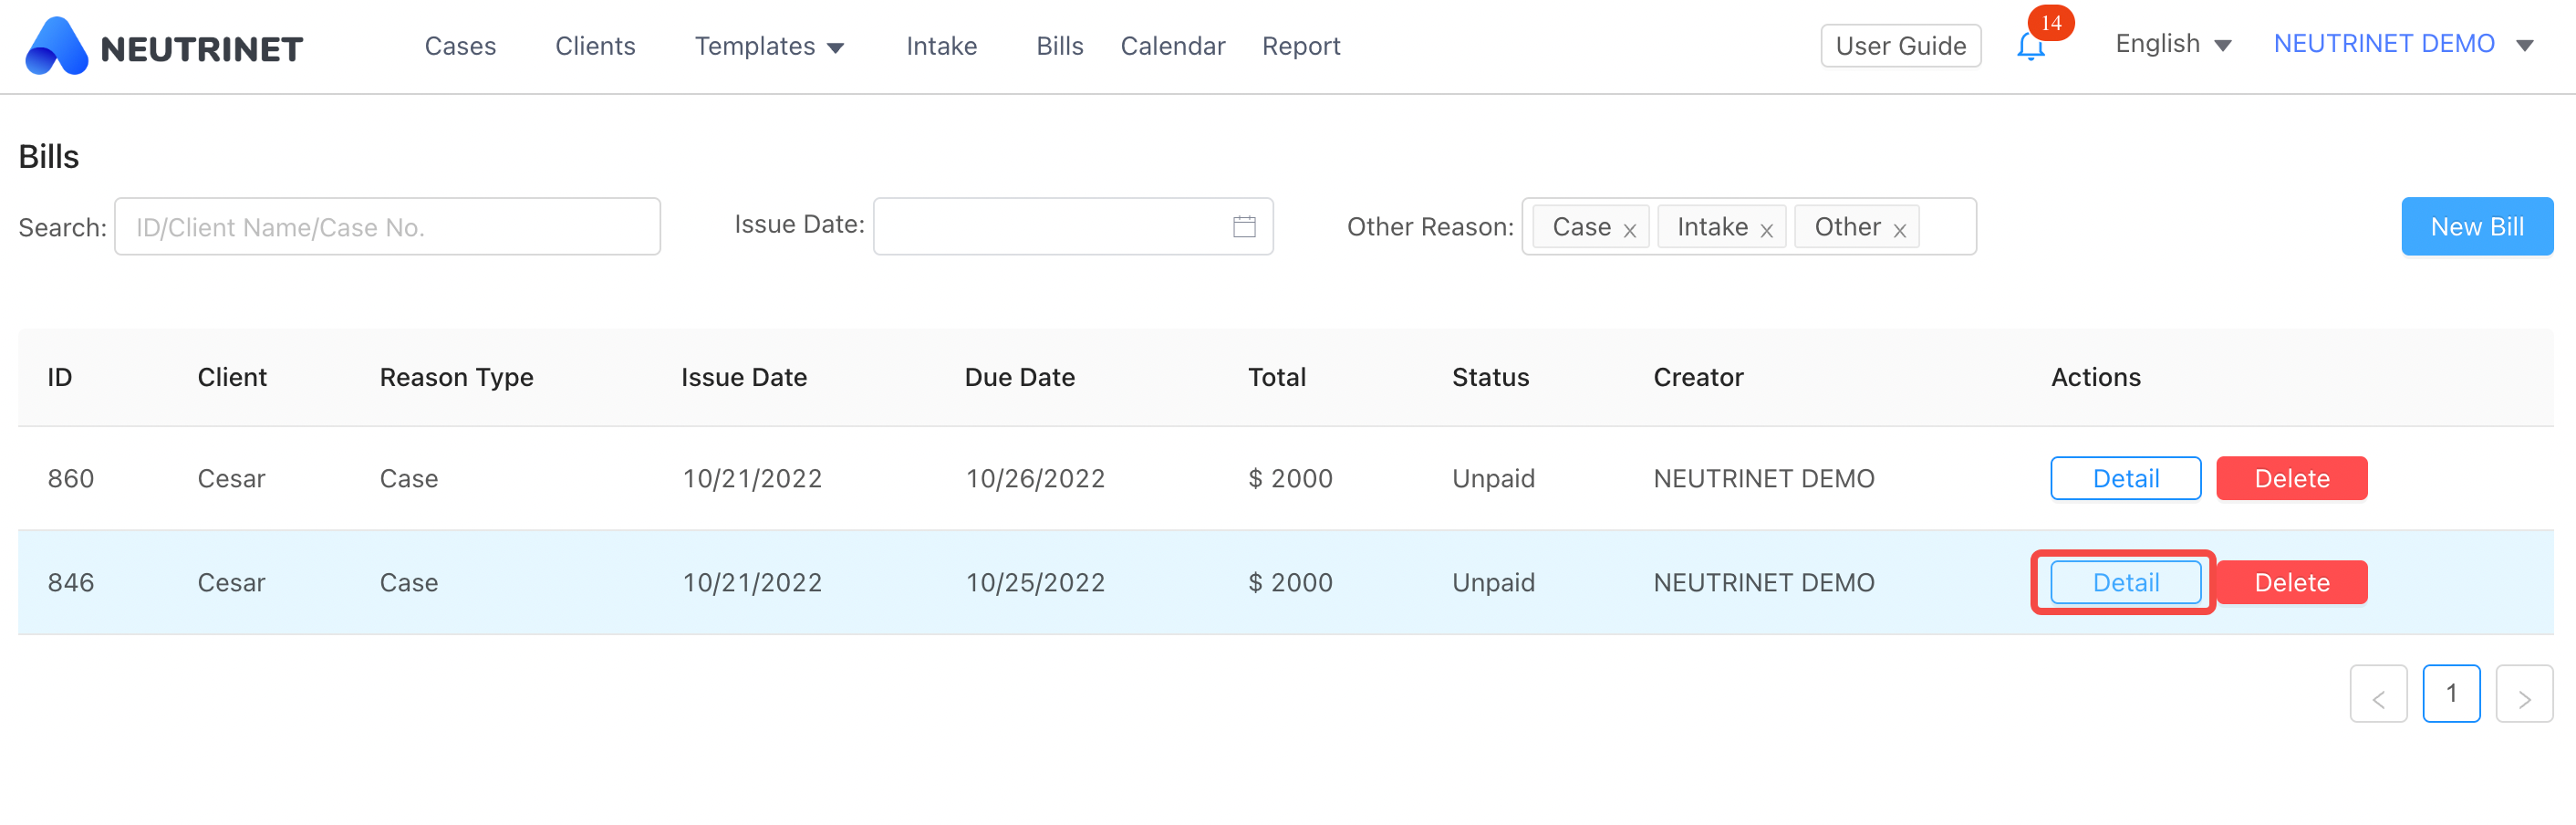
Once a bill is created, it will appear in your list. Click on Details to view or manage it. From this screen:
Integrated Payments: If you have integrated LawPay, you can send a digital payment request directly to the client.
Manual Sending: If you do not use LawPay, click Download to save the invoice as a PDF and send it via your preferred email client.
4. Recording Payments
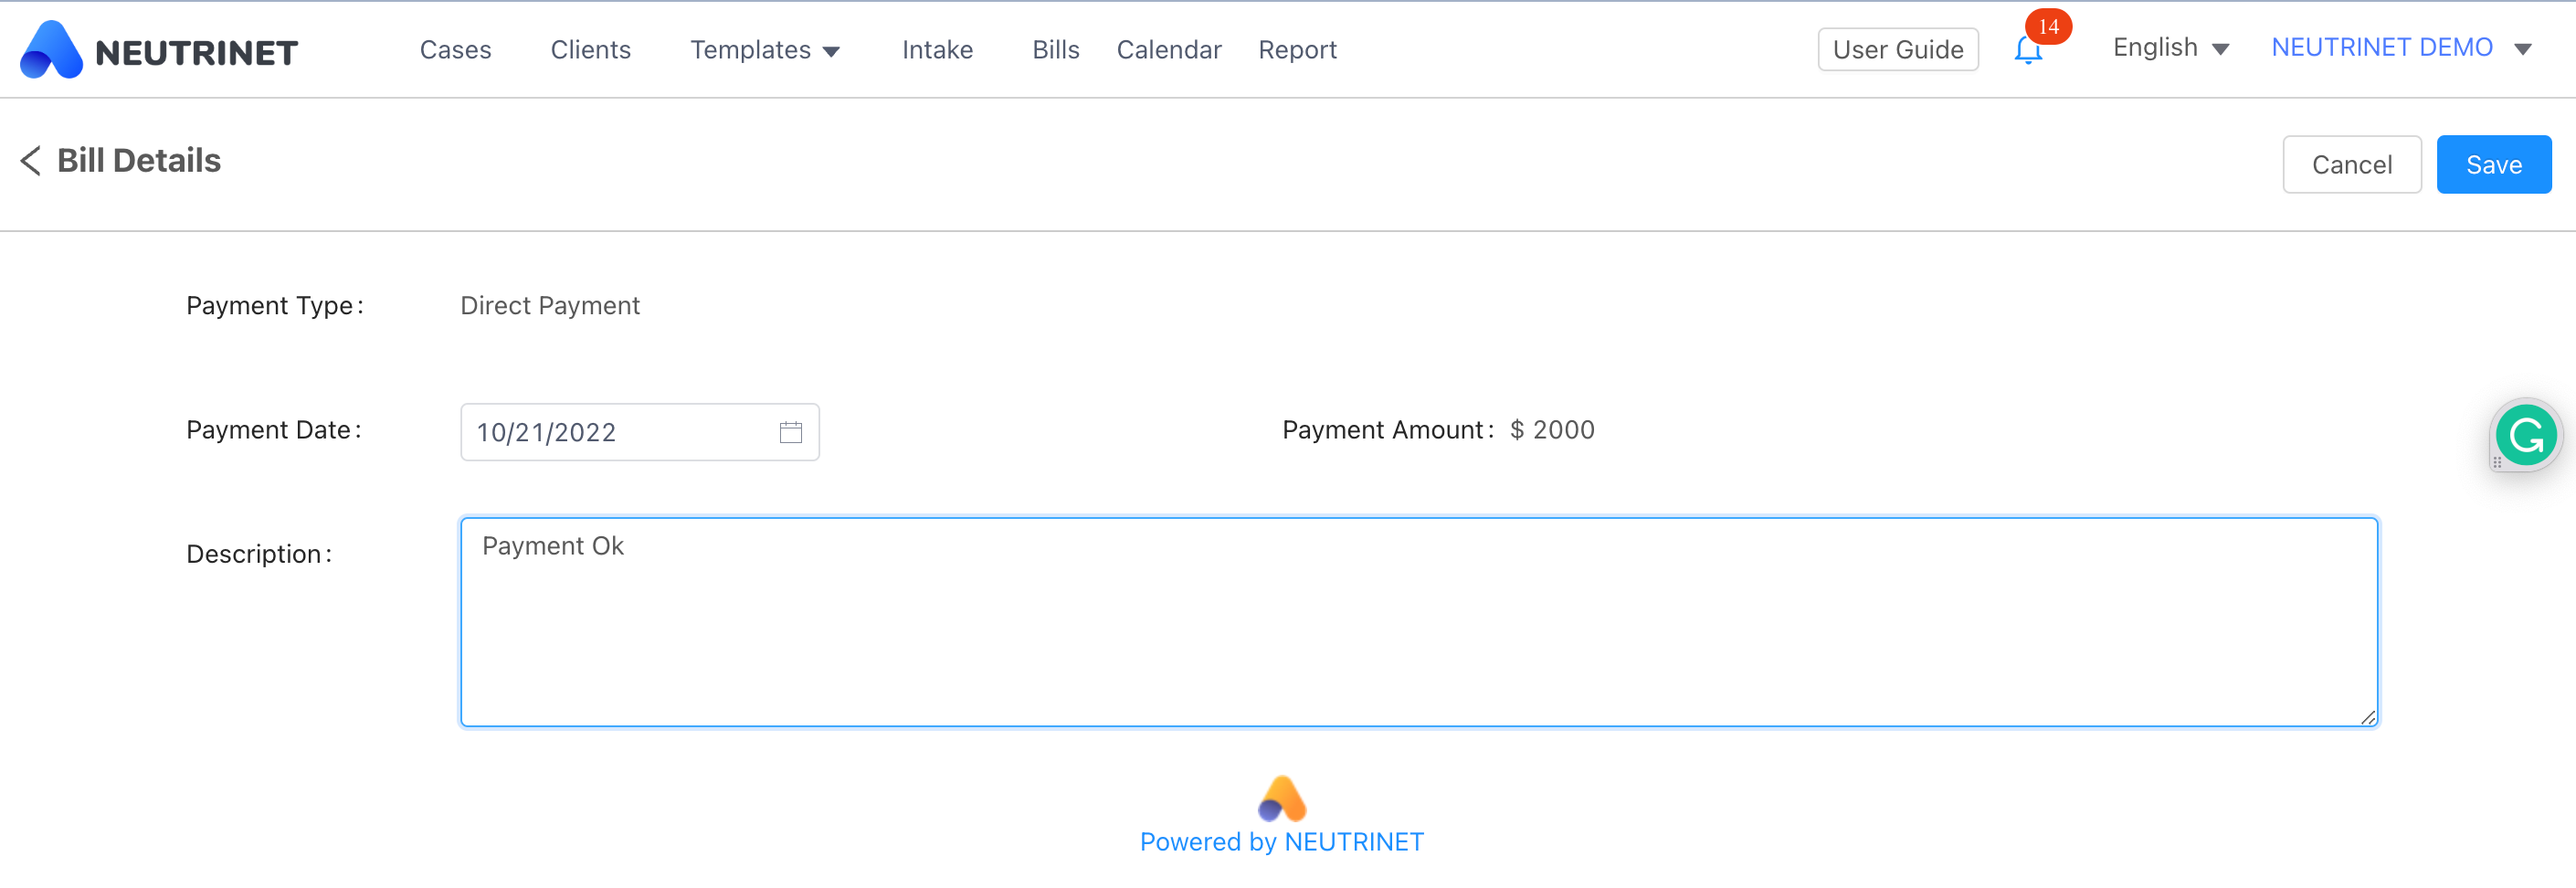
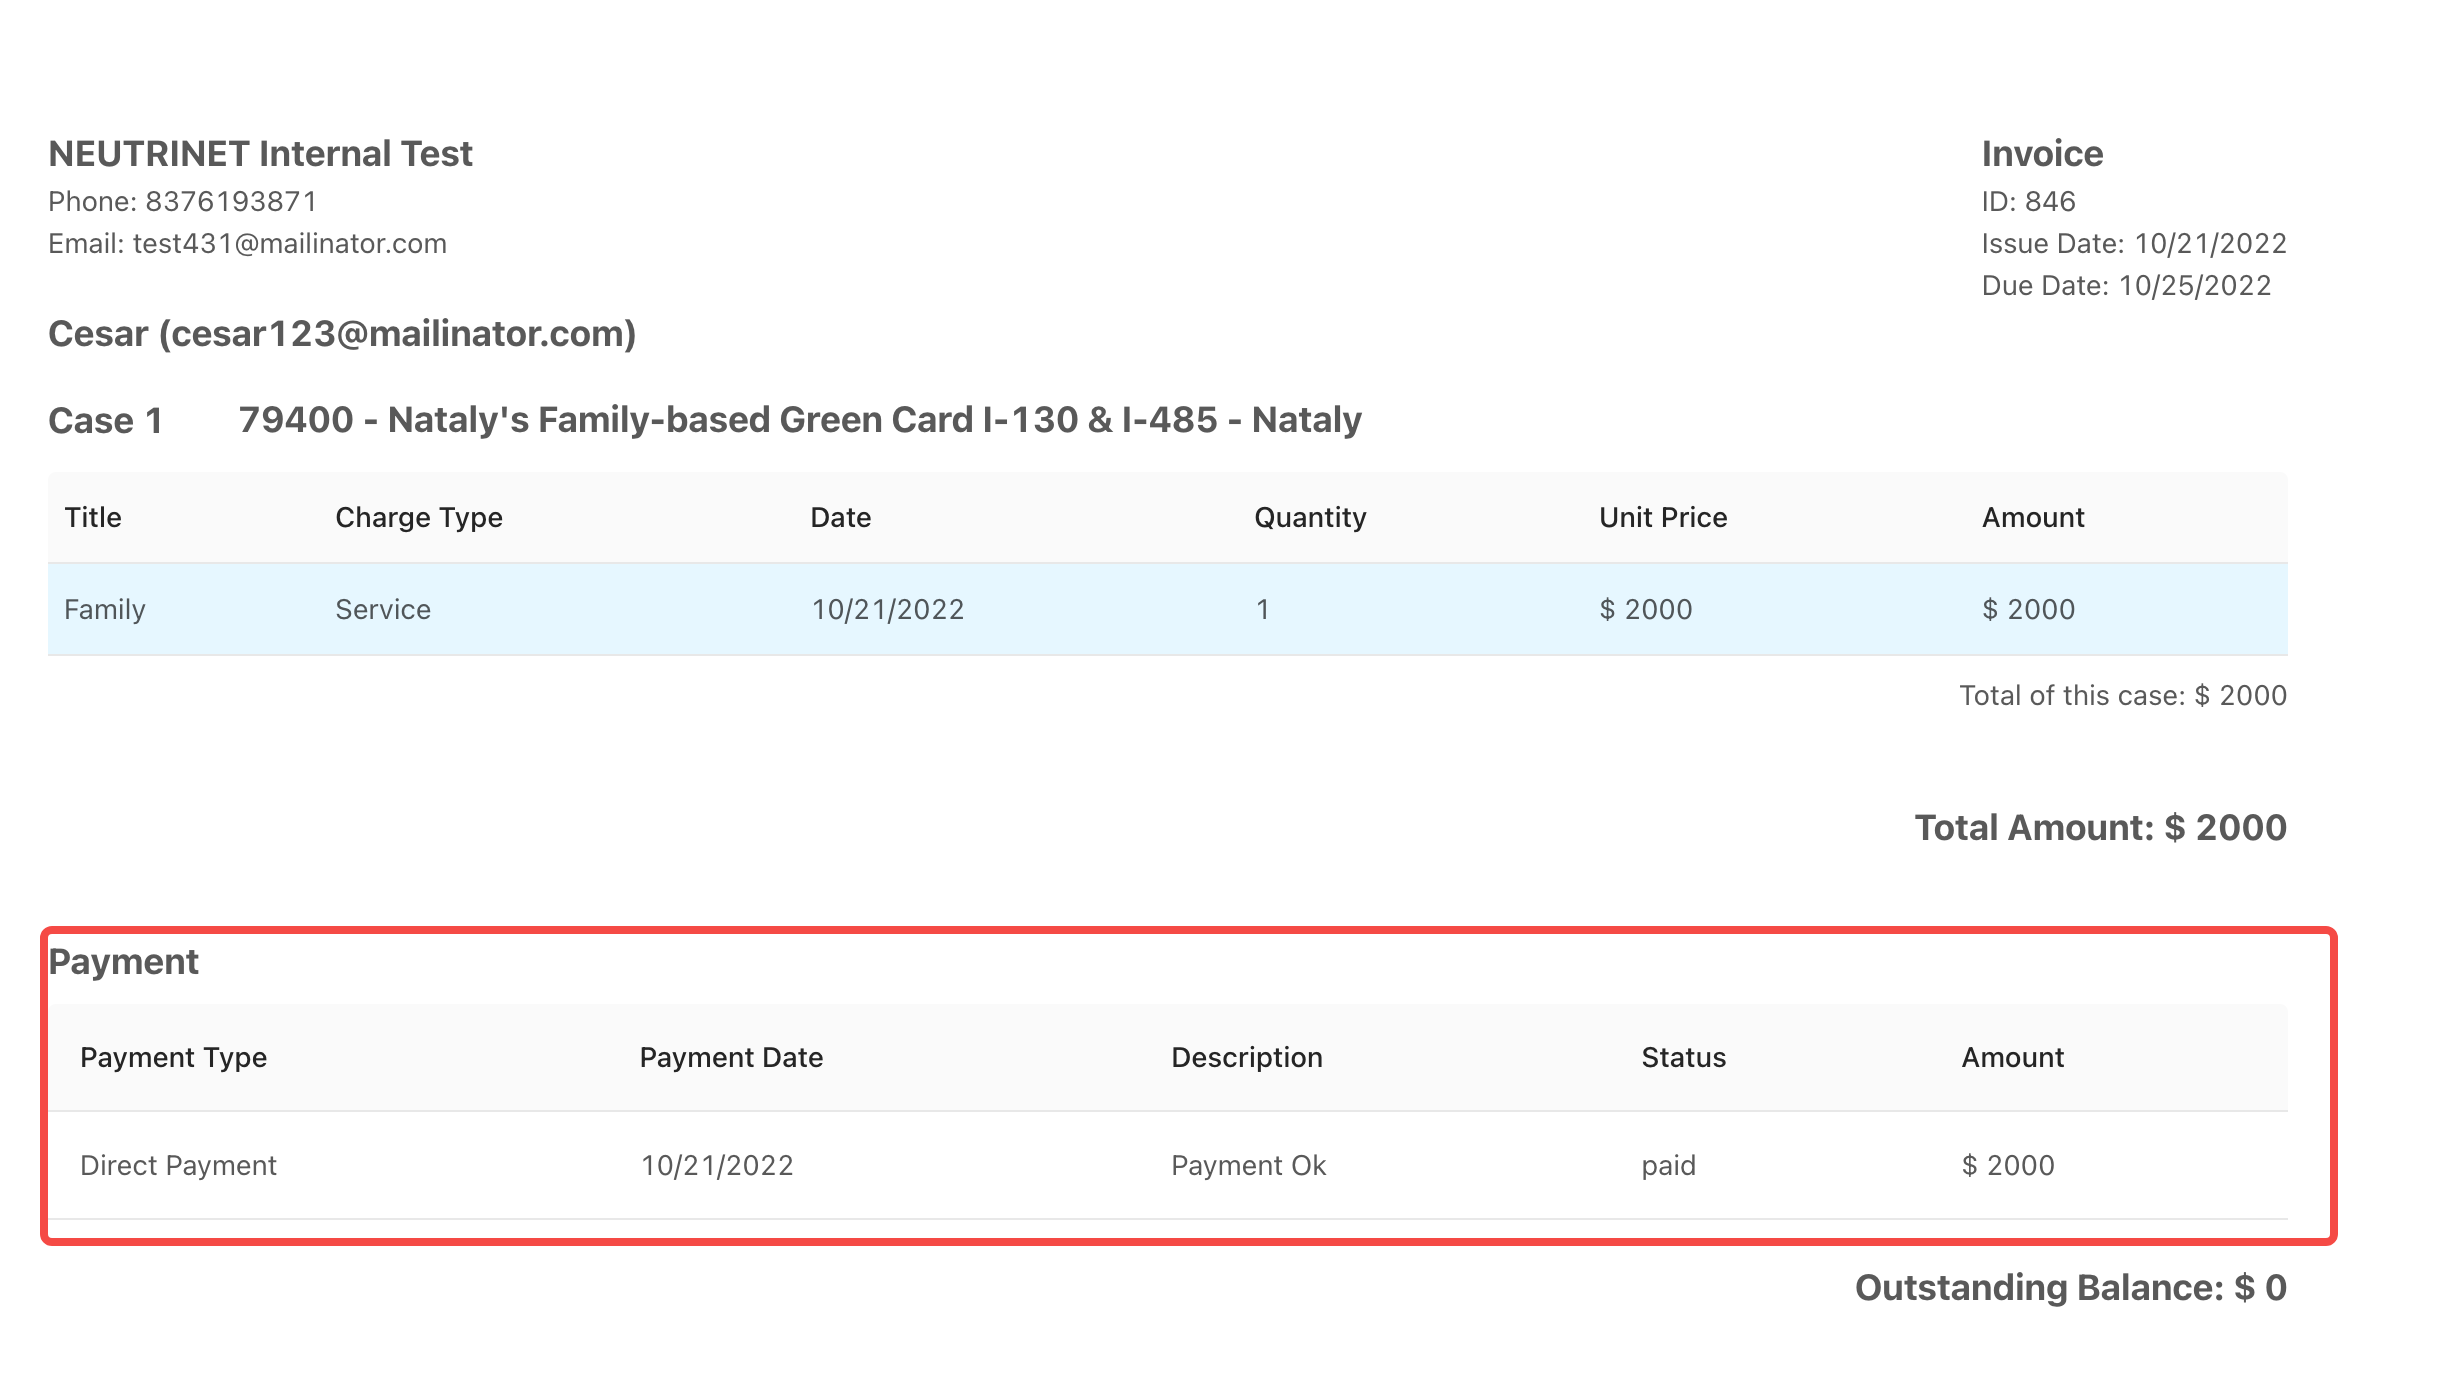
When you receive a payment, select Record Payment. Enter the specific amount received, and the system will automatically update the invoice status and balance.
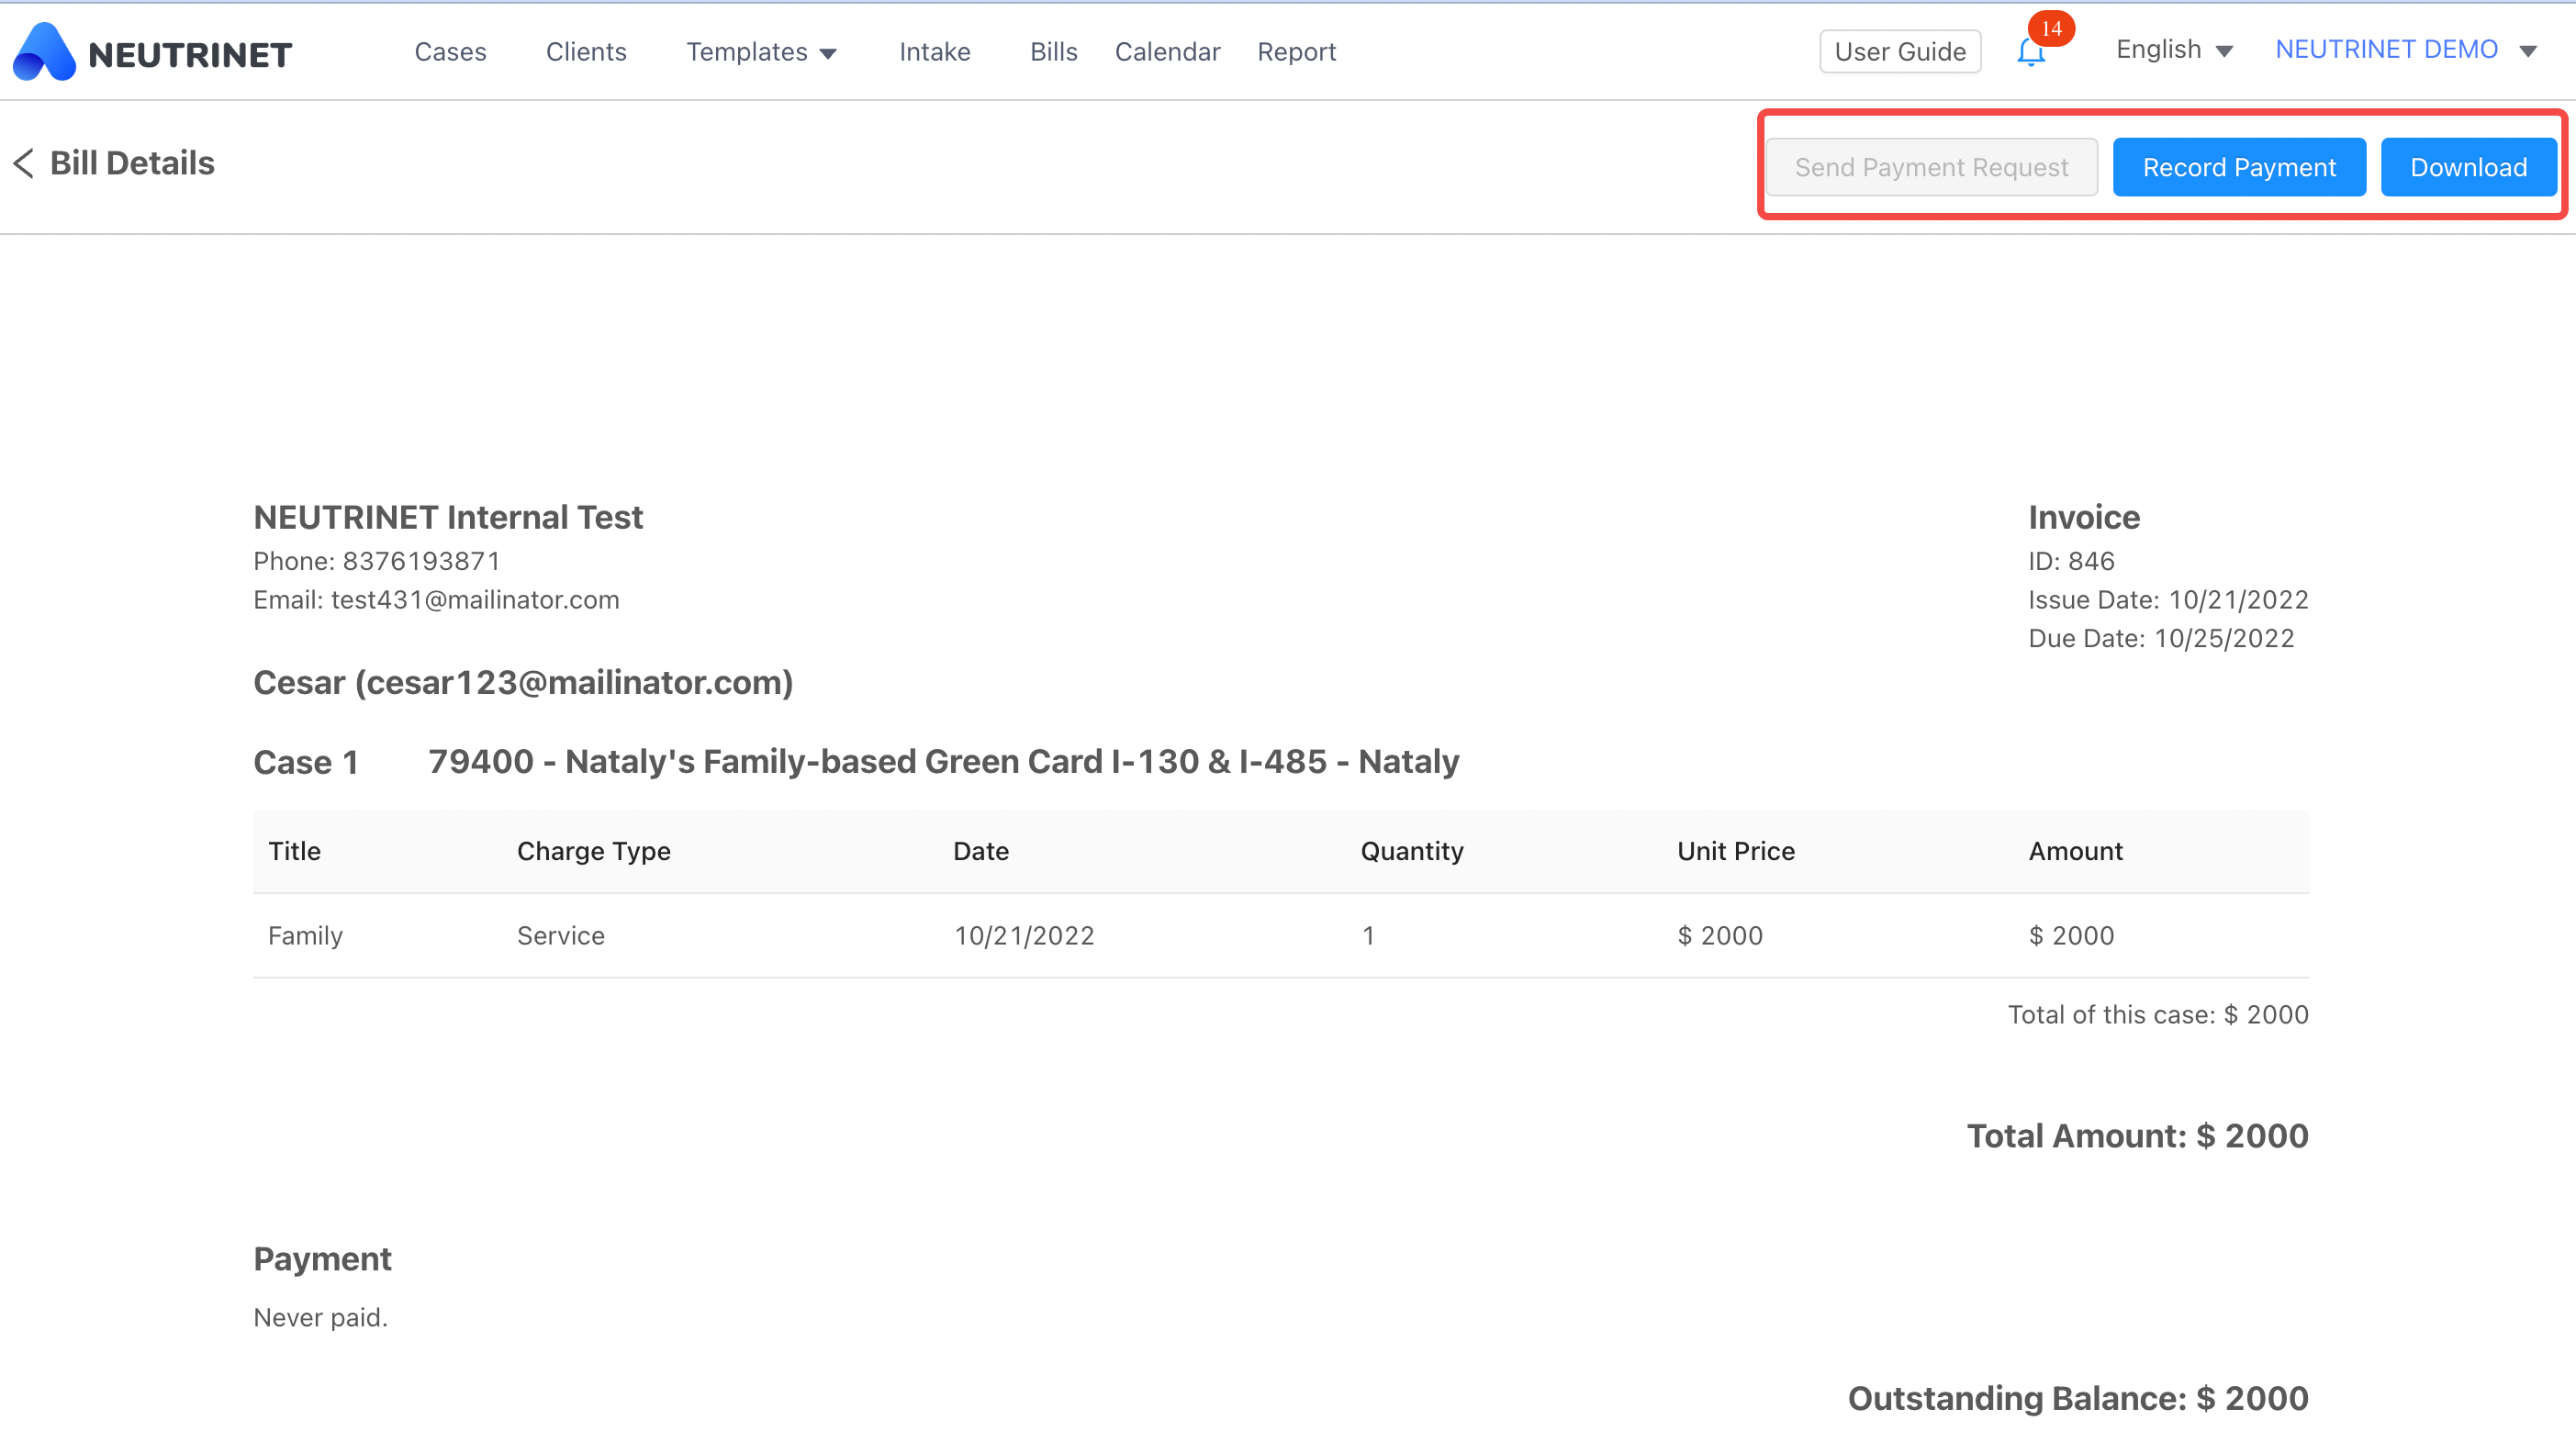
If you select Record Payment, you'll inform the amount received, which will be registered in the invoice.
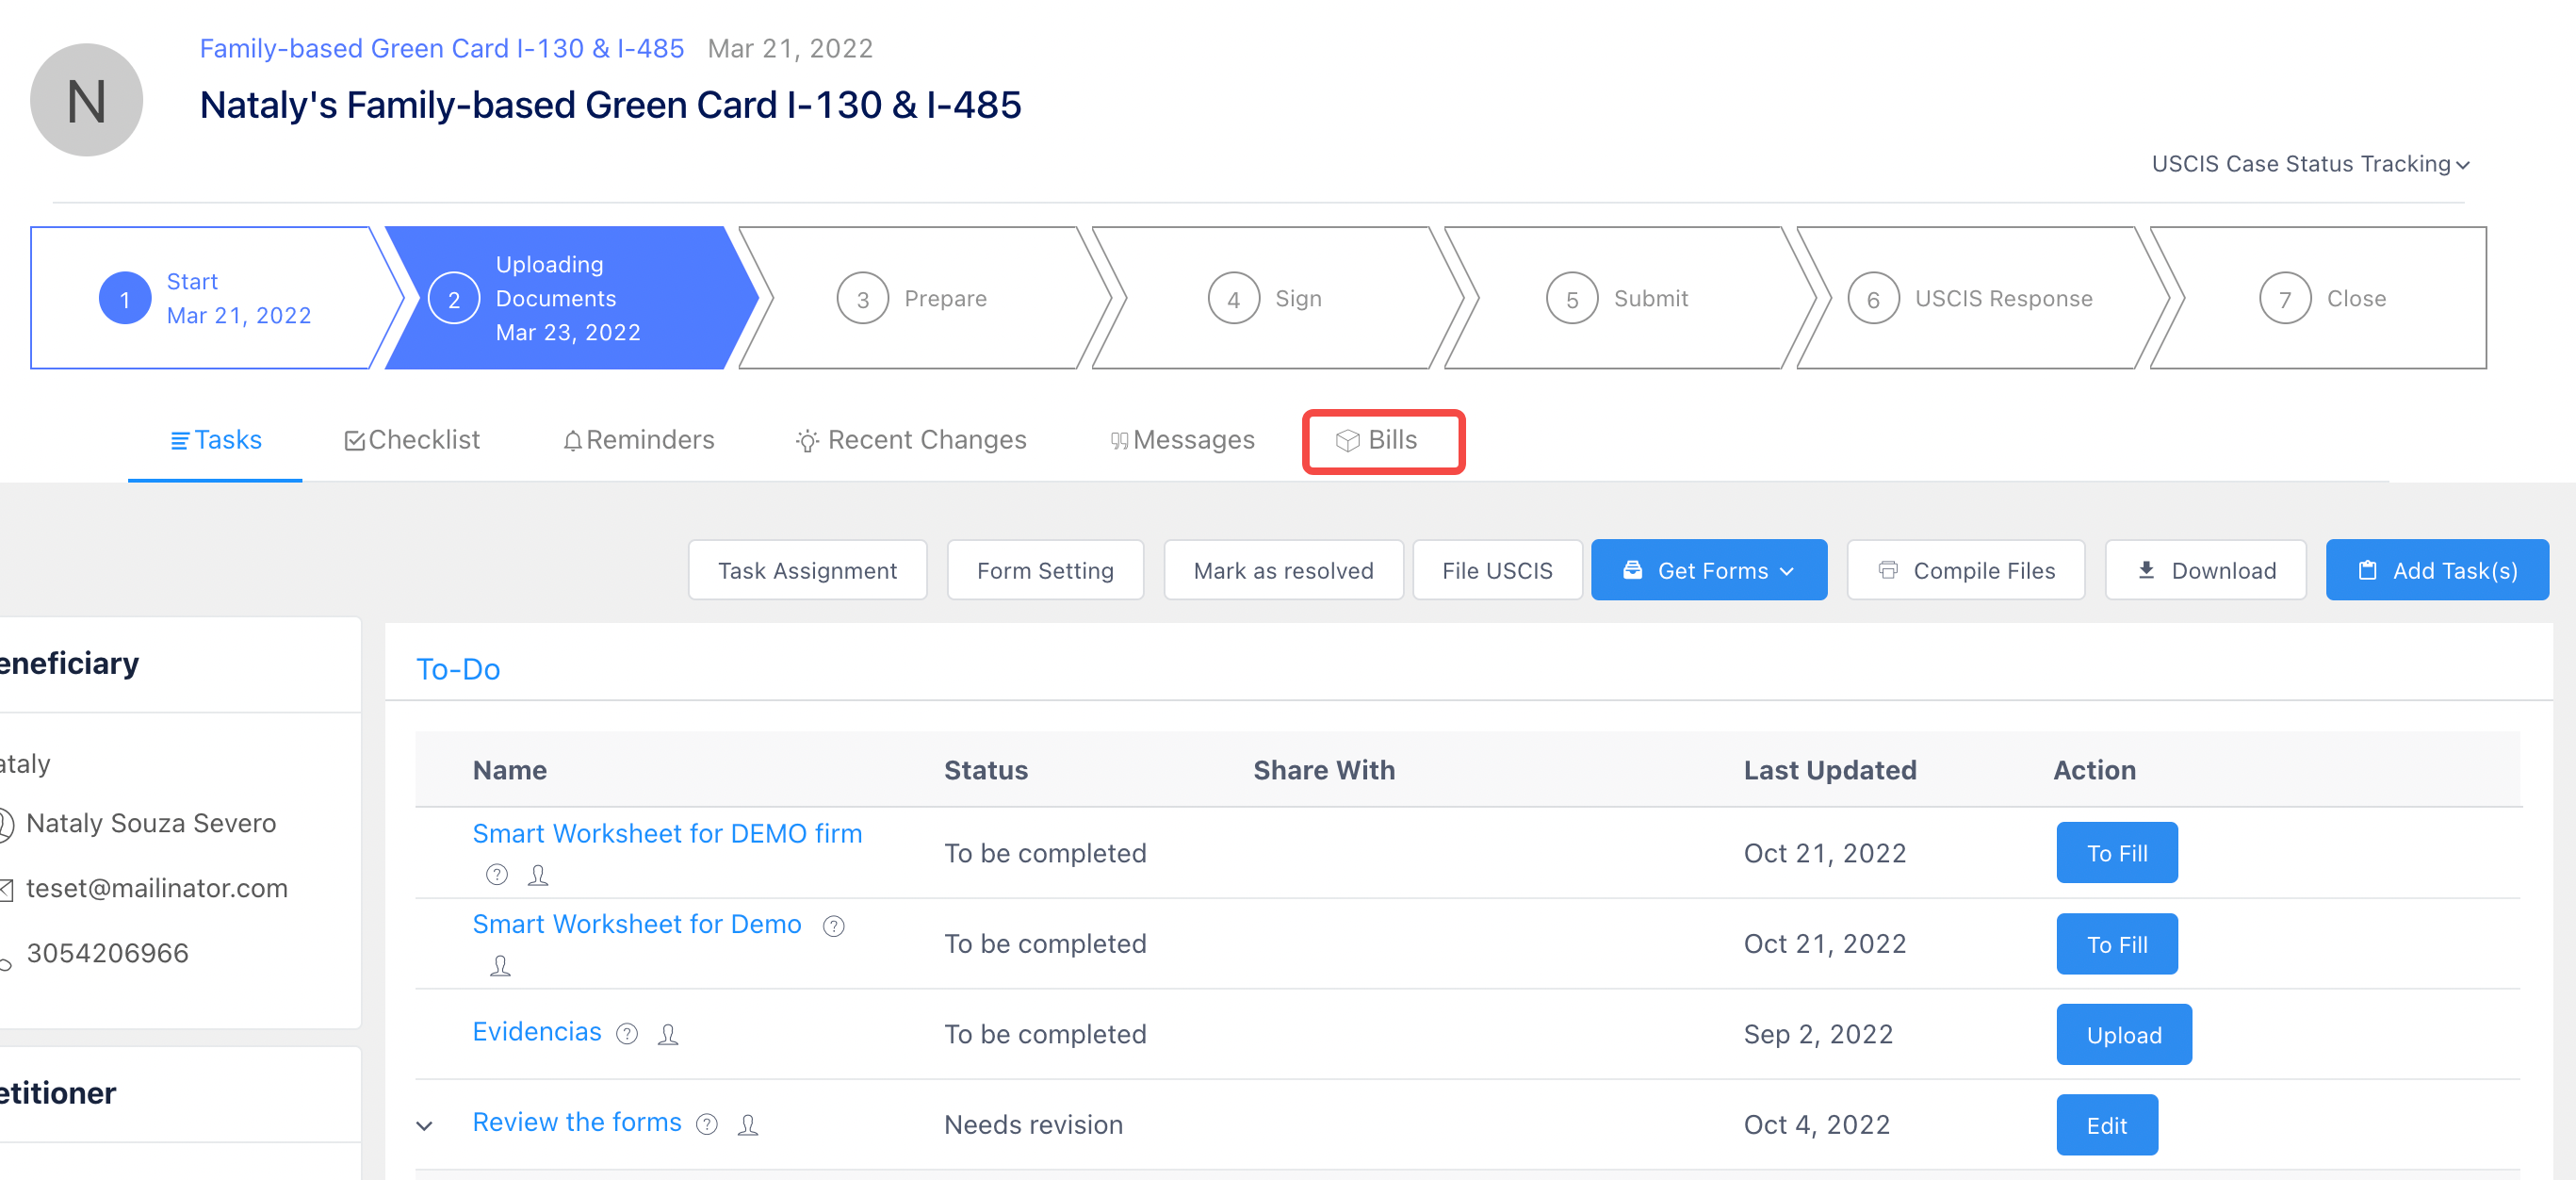
5. Quick Billing from a Case
You can also create a new bill from directly within a specific case file. Simply click the Bills tab inside the case and follow the same steps outlined above for a faster workflow.
Comments
0 comments
Please sign in to leave a comment.